Malabar spinach (Basella alba) is an excellent leafy green vegetable known for its lush, thick, and succulent leaves. Unlike traditional spinach, which prefers cooler climates, Malabar spinach thrives in warmer conditions, making it a popular choice for gardeners in hotter regions. This versatile plant can enhance salads, stir-fries, and soups, and it’s also packed with vitamins and nutrients. One of the advantages of growing Malabar spinach is that it doesn’t necessarily require climbing supports like trellises—a benefit for gardeners with limited space. In this article, we’ll explore easy steps to successfully grow Malabar spinach in your garden without climbing support, ensuring you enjoy the bounty of this delicious plant.
Understanding Malabar Spinach
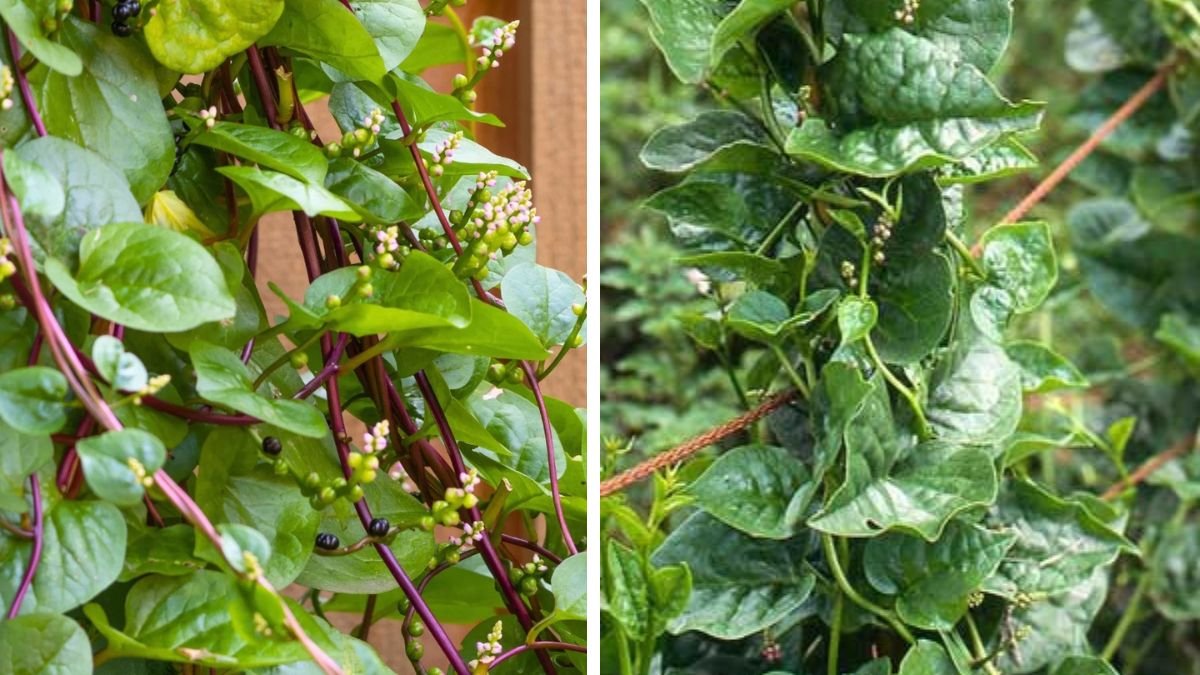
Before jumping into the growing steps, let’s understand what Malabar spinach is. Native to Southeast Asia, this perennial vine is not a true spinach but is appreciated for its similar flavor profile and texture. The plant produces thick, fleshy leaves, which can be consumed raw or cooked. Besides being nutritious, they add vibrancy to your dishes with their rich green color.
Nutritional Benefits
Malabar spinach is packed with vitamins A, C, and K, along with essential minerals like calcium and iron. It also contains antioxidants that help scavenge harmful free radicals in the body, promoting overall health. Additionally, its mucilaginous texture makes it a great thickening agent for soups and curries.
Step-by-Step Guide to Growing Malabar Spinach Without Climbing Support
Step 1: Choose the Right Location
Malabar spinach loves sunlight, so select a location in your garden that receives at least 6 to 8 hours of direct sunlight daily. Ensure the area has well-draining soil to prevent waterlogging, which could lead to root rot.
Step 2: Prepare the Soil
-
Soil Type: Malabar spinach thrives in a loamy soil enriched with organic matter. Amend heavy clay or sandy soil with compost to improve its texture and nutrient content.
-
Soil pH: Aim for a pH level of 6.0 to 7.0. You can test your garden soil using a pH kit to ensure it’s suitable for the plant.
-
Tilling the Soil: Till the soil to a depth of at least 12 inches to break up compacted areas and improve aeration. Mix in compost or well-rotted manure to provide essential nutrients.
Step 3: Sowing Seeds
-
When to Plant: The best time to sow Malabar spinach seeds is in late spring, after the last frost date, as the plant is sensitive to frost.
-
Seed Preparation: Soak the seeds in water for 24 hours before planting to enhance germination rates.
-
Sowing: Plant the seeds about 1 inch deep and 12 inches apart to allow sufficient space for growth. Depending on your garden’s layout, scatter the seeds if you desire a more bush-like growth.
Step 4: Watering
-
Regular Watering: Keep the soil consistently moist, especially during dry spells. Water the seedlings regularly—aim for 1 to 2 inches of water per week.
-
Mulching: Apply a layer of organic mulch around the plants to retain moisture, suppress weeds, and maintain a stable soil temperature.
-
Avoid Waterlogging: Ensure that the soil is well-draining to prevent the roots from sitting in water, which can cause diseases.
Step 5: Fertilization
-
Organic Fertilizers: Use organic fertilizers, such as fish emulsion or algae extract, to promote healthy growth. Apply every 4 to 6 weeks during the growing season.
-
Nitrogen-Rich Fertilizers: Since Malabar spinach is a leafy green, it benefits from nitrogen-rich fertilizers. This encourages lush foliage, which is the primary edible part of the plant.
Step 6: Pest and Disease Management
-
Identifying Pests: Common pests that may affect Malabar spinach include aphids, spider mites, and whiteflies. Regularly inspect your plants for signs of infestations.
-
Natural Remedies: Use insecticidal soap or neem oil to control pests without harming beneficial insects. Additionally, introducing natural predators, such as ladybugs, can help manage pest populations.
-
Disease Prevention: To prevent fungal diseases, ensure good air circulation between plants and avoid overhead watering. Remove any diseased or damaged leaves promptly.
Step 7: Pruning and Maintenance
-
Regular Pruning: Since Malabar spinach does not require climbing supports, it can use pruning to maintain a bushy shape. Pinch back the tips of the plant to encourage lateral growth and increase leaf production.
-
Harvesting: You can begin to harvest leaves once the plant is well-established, usually within 2 to 3 months after planting. Harvest the outer leaves to encourage continuous growth. Don’t harvest more than a third of the plant at one time to avoid stress.
-
Continual Harvesting: The more you harvest, the more the plant will produce. Regularly check for leaves that are ready to be picked.
Step 8: Enjoying Your Harvest!
Once your Malabar spinach is ready for harvest, you can enjoy it in various dishes. Use the leaves fresh in salads, sauté them in olive oil for a delicious side, or cook them in soups and stews. Their unique flavor and texture can enhance many meals.
Additional Tips for Growing Malabar Spinach
-
Companion Planting: Plant Malabar spinach alongside tomatoes, peppers, or eggplants, which can help deter pests and improve growth.
-
Crop Rotation: Practice crop rotation each year to maintain soil health and prevent disease build-up.
-
Location Rotation: If possible, avoid planting Malabar spinach in the same spot every year to reduce the risk of soil-borne diseases.
Frequently Asked Questions (FAQs)
1. Can I grow Malabar spinach in containers?
Yes, Malabar spinach can be grown in containers. Use a pot that is at least 12 inches deep to accommodate the root system and ensure good drainage.
2. How long does Malabar spinach take to grow?
Malabar spinach typically takes about 60 to 90 days to mature. You can start harvesting leaves once the plant is well-established.
3. Is Malabar spinach frost-tolerant?
No, Malabar spinach is sensitive to frost. It is best to plant it after the last frost date in your area.
4. Can Malabar spinach be grown indoors?
Yes, Malabar spinach can be grown indoors if provided with sufficient sunlight (at least 6 hours per day). Ensure good ventilation and proper drainage.
5. How can I store harvested Malabar spinach?
Store fresh Malabar spinach in the refrigerator in a plastic bag. It is best used within a week for maximum freshness.
6. Is Malabar spinach suitable for all climates?
Malabar spinach thrives in warmer climates (USDA zones 9-11), but it can also be grown in cooler climates as an annual, provided it is planted after the last frost.
Conclusion
Growing Malabar spinach in your garden is a rewarding endeavor that doesn’t necessitate climbing supports, making it accessible for many gardeners. With these easy steps—from selecting the right location and preparing the soil to sowing seeds and maintaining your plants—you can enjoy a continuous supply of fresh, nutritious greens. So, roll up your sleeves and reap the benefits of this delightful and versatile vegetable!