Bitter melon, also known as bitter gourd or karela, is one of the most nutritious vegetables you can grow in your home garden. Packed with vitamins, antioxidants, and medicinal properties, it is a staple in Asian kitchens and Ayurvedic practices. Yet many people assume that growing bitter melon is difficult, especially from seeds.
The truth? Bitter melon is surprisingly easy to cultivate once you understand its unique needs. With the right preparation, seeds can sprout quickly, vines can grow vigorously, and you can enjoy fresh, organic bitter gourds right from your backyard, balcony, or terrace.
This article walks you through the entire journey—from selecting seeds to harvesting perfect fruits—just as I’ve done successfully in my own home garden. Whether you’re a beginner or experienced gardener, this guide will help you grow bitter melon with confidence.
🌱 Why Grow Bitter Melon at Home?

Before we begin, here’s why bitter melon is worth the space and effort:
- Highly Nutritious: Rich in vitamin C, vitamin A, iron, potassium, and antioxidants.
- Medicinal Benefits: Known to help regulate blood sugar, improve digestion, and boost immunity.
- Fast Growing: Vines grow rapidly and produce fruit within 60–70 days.
- Low Maintenance: Minimal pests, easy training, and simple care.
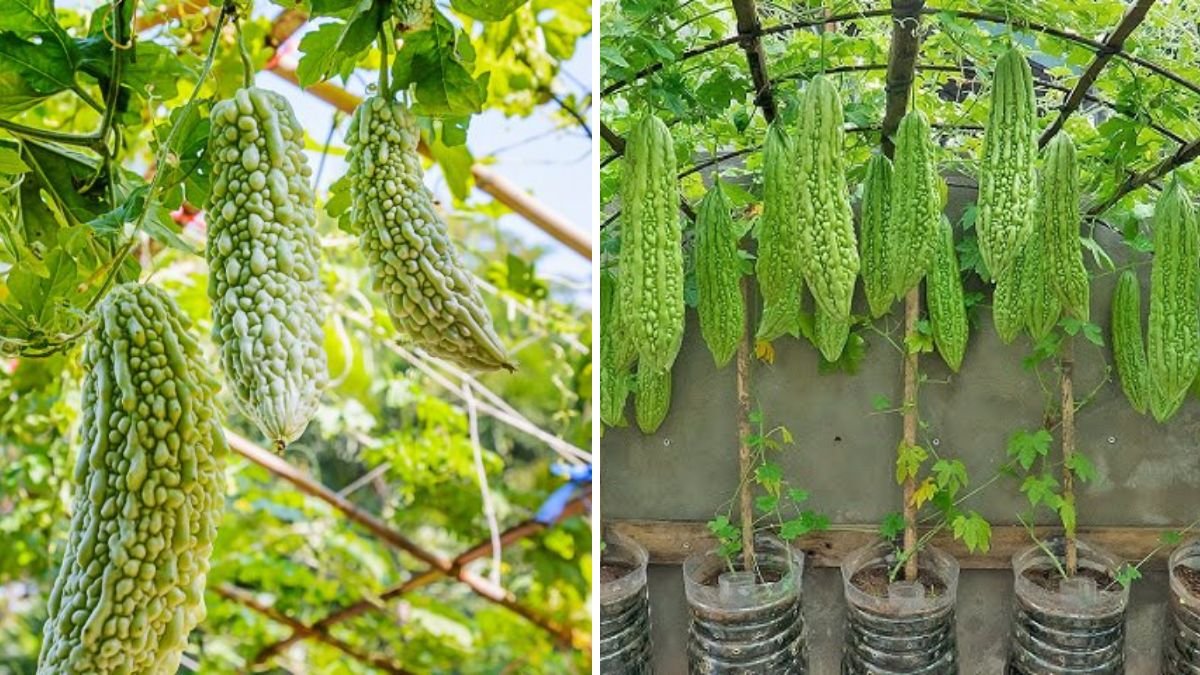
- Ideal for Small Spaces: Can be grown in pots or vertical trellises.
Now, let’s dive into the seed-to-harvest process.
🌾 Step 1: Choosing the Right Seeds
Growing bitter melon starts with choosing the right variety. The two common types are:
1. Indian Bitter Melon
- Dark green
- Rough, spiky skin
- More bitter
- Compact fruits
2. Chinese Bitter Melon
- Light green
- Smoother skin
- Mild bitterness
- Longer fruits
Both varieties grow well from seeds, but choose the type you prefer for taste and appearance. If you want higher productivity, pick hybrid seeds—but if you want traditional flavor, go for local open-pollinated varieties.
🌡 Step 2: Preparing Bitter Melon Seeds for Fast Germination
Bitter melon seeds have a thick outer shell, which slows down germination. To get quick and uniform sprouting, here’s what I do:
🔹 Scarification Method (Most Effective)
Using a nail cutter or sandpaper, slightly file the pointed end of the seed.
Don’t break the seed—just thin the coat.
This helps water enter the seed faster.
🔹 Warm Water Soaking
Soak the seeds in warm water for 12–24 hours.
This softens the shell and activates germination enzymes.
🔹 Pre-sprouting in Tissue Paper
Place soaked seeds in moist tissue paper and keep them in a warm place for 2–3 days.
You’ll see tiny roots emerge—now they’re ready for planting.
This method gives me a 95–100% germination rate.
🪴 Step 3: Soil Preparation—The Secret to Strong Vines
Bitter melon thrives in light, fertile, well-drained soil. Avoid clay-heavy or waterlogged soil.
Ideal Soil Mix:
- 40% Garden soil
- 30% Compost or cow dung manure
- 20% Cocopeat
- 10% Sand or perlite
Soil pH: Slightly acidic to neutral (6.0–7.0)
Before planting, mix:
- A handful of neem cake
- 1 cup of vermicompost
- Wood ash (for potassium)
This ensures healthy root development and better fruiting.
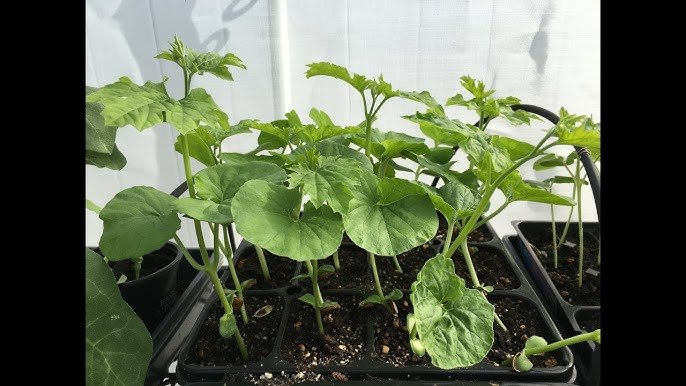
🌿 Step 4: Planting the Seeds
Once seeds sprout, plant them directly into the soil or pots.
Planting Depth: 1–1.5 cm deep
Spacing: 1 plant every 1.5–2 feet
Pot Size: Minimum 12–14 inches deep
After planting:
- Water lightly
- Keep the soil moist, not soggy
- Place the pot/bed in full sunlight
In 5–7 days, seedlings will emerge strong and healthy.
☀️ Step 5: Providing Sunlight and Temperature
Bitter melon loves warmth.
Sunlight: Minimum 6–8 hours of direct sunlight
Temperature: 25–32°C is ideal
Too little sunlight results in:
- Slow growth
- Weak vines
- Fewer fruits
If you’re growing on a balcony or terrace, choose the sunniest spot.
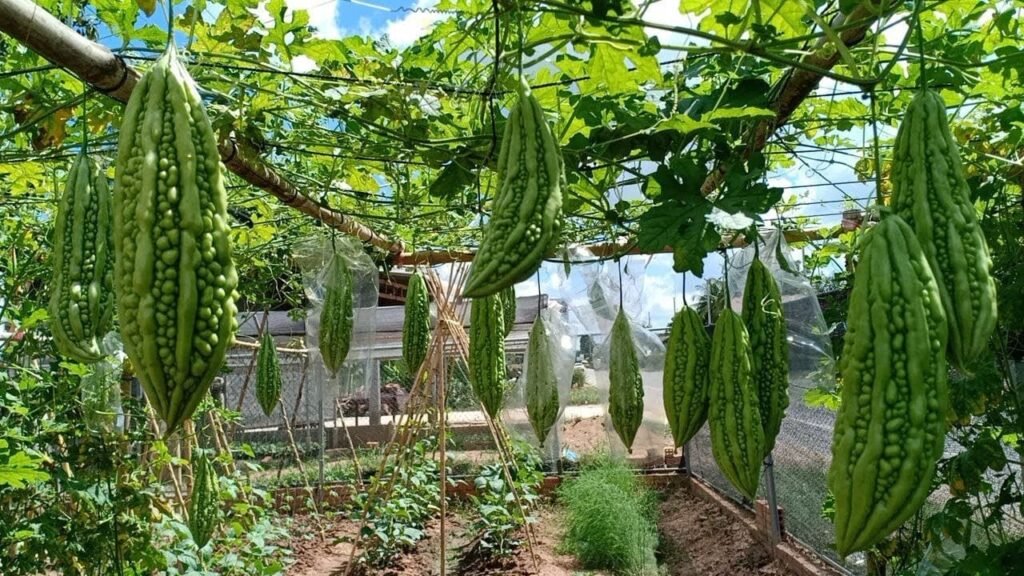
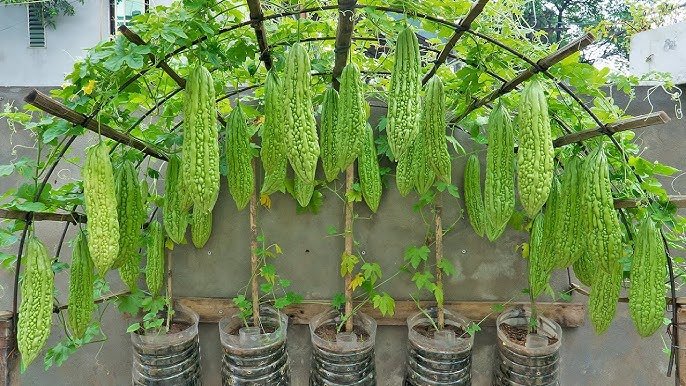
🌿 Step 6: Setting Up the Trellis (Very Important)
Bitter melon is a climbing vine and must have support.
Trellis Options:
- Bamboo poles
- Wire mesh
- Rope net
- Vertical climbing frame
Provide support when the plant is about 1 foot tall.
A trellis:
- Keeps fruits clean
- Improves air circulation
- Reduces pests
- Increases fruit size and yield
Train the vines gently by wrapping them around the structure.
💧 Step 7: Watering the Right Way
Bitter melon requires consistent moisture, but overwatering is harmful.
Watering Schedule:
- Seedling Stage: Light watering every day
- Growing Stage: Deep watering every 2–3 days
- Flowering Stage: Reduce watering slightly
- Fruiting Stage: Water deeply but less frequently
Always water at the base, not the leaves.
Mulching with dry leaves or straw helps retain soil moisture and keeps roots cool.
🌸 Step 8: Flowering and Pollination
Around 30–40 days after planting, you’ll see yellow flowers blooming.
Bitter melon has:
- Male flowers: Appear first
- Female flowers: Appear later with a tiny fruit under the flower
If bees are active, pollination happens naturally.
But if fruiting is slow, hand-pollinate:
- Pick a fresh male flower
- Remove its petals
- Rub the pollen gently onto the female flower
This increases fruit set dramatically.
🌿 Step 9: Fertilizing for Maximum Yield
Bitter melon is a heavy feeder.
Here is a perfect organic fertilizer schedule:
20 Days After Planting
- 1–2 handfuls of vermicompost
35 Days
- Mustard cake liquid fertilizer
(Mix 100 g mustard cake in 1 L water, ferment 4–5 days, dilute 1:10)
During Flowering
- 1 cup wood ash
- Banana peel fertilizer (rich in potassium)
Every 15–20 Days
- Compost tea
- Seaweed extract (optional)
These fertilizers help vines grow vigorously and produce more fruits.
🐛 Step 10: Natural Pest & Disease Control
Common pests include:
- Aphids
- Whiteflies
- Fruit flies
- Powdery mildew
Here’s how I control them organically:
Neem Oil Spray
Mix:
- 5 ml neem oil
- 1 liter water
- A few drops liquid soap
Spray every 7–10 days.
Garlic-Chili Spray
Keeps insects away effectively.
Yellow Sticky Traps
Trap flying pests like whiteflies.
Avoid Overwatering
Prevents fungal attacks.
With these simple steps, your vines stay healthy throughout the season.
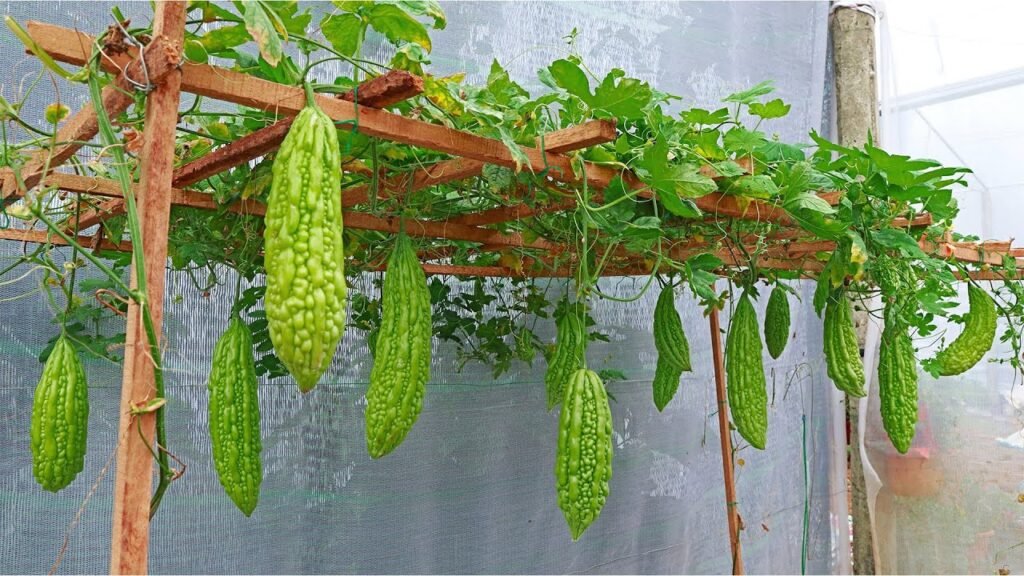
🍈 Step 11: When and How to Harvest Bitter Melon
Bitter melon grows very fast. Once fruits appear, they mature in 10–15 days.
Signs of a mature fruit:
- Firm texture
- Glossy skin
- Light green or dark green depending on variety
- 4–6 inches long (for Indian variety)
Don’t wait too long—overripe fruits turn yellow and extremely bitter.
Use a sharp scissor or knife to cut fruits along with a small stem.
Once harvesting begins, the plant keeps producing more fruits.
🌟 Extra Tips for Bigger, Healthier Bitter Melons
✔ Pinch the growing tips when vines reach 6–7 feet
✔ Remove yellow or diseased leaves
✔ Train multiple vines in different directions
✔ Use organic mulch
✔ Keep trellis strong enough to support weight
✔ Avoid nitrogen-heavy fertilizers (causes leaf growth, fewer fruits)
🌱 Final Thoughts: Enjoy the Joy of Growing Your Own Bitter Melon
Growing bitter melon from seeds is not only easy but incredibly rewarding.
With just a few plants, you can harvest fresh karela throughout the season—far healthier, tastier, and safer than store-bought vegetables.
Whether you grow it in your backyard, terrace, balcony, or garden beds, bitter melon will thrive as long as you provide warmth, sunlight, and proper support.
Follow this guide step by step, and within a couple of months, you’ll be harvesting fresh, healthy, homegrown bitter gourds that your family will love.