Broccoli is a powerhouse vegetable packed with vitamins, minerals, and antioxidants. Its crisp texture and slightly sweet taste make it a favorite in salads, stir-fries, and soups. But what if you live in an apartment, have limited garden space, or just want a simple, cost-effective way to grow fresh broccoli at home?
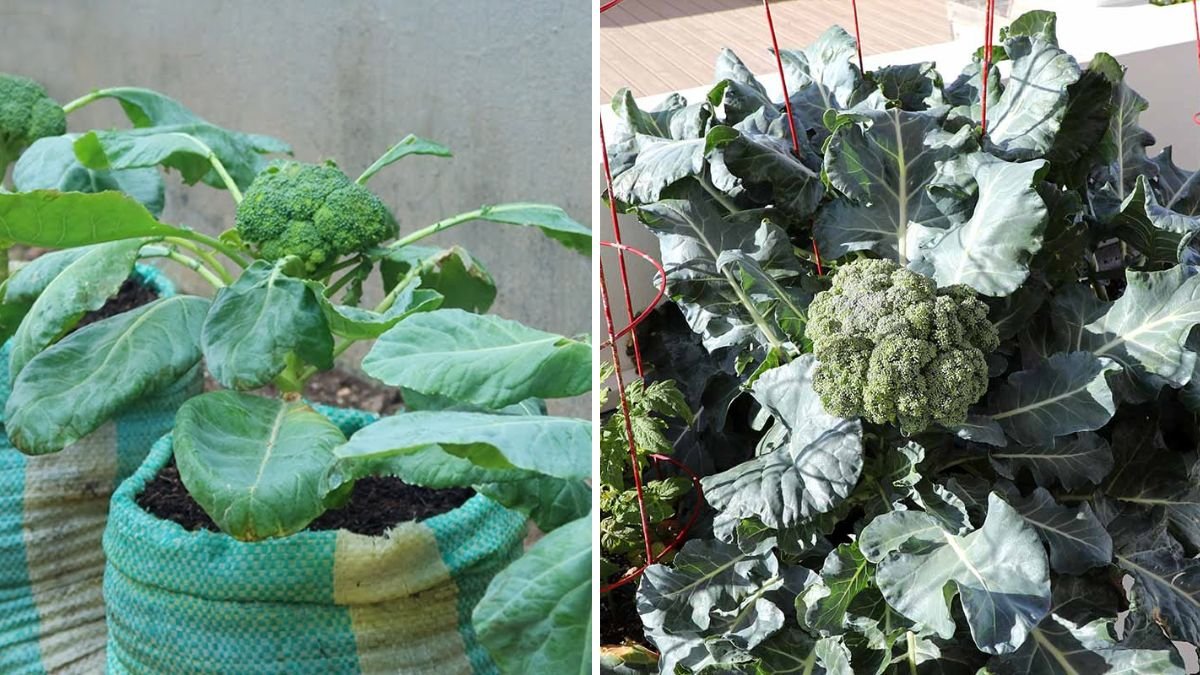
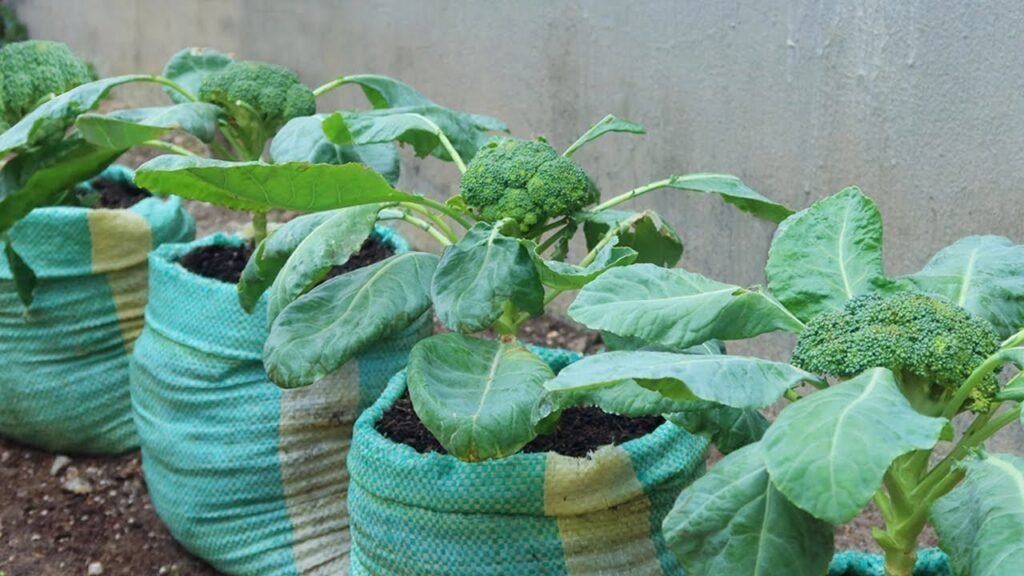
The solution is surprisingly simple: growing broccoli in plastic bags. This innovative small-space gardening hack allows anyone—even beginners—to cultivate healthy, productive broccoli plants without needing a traditional garden plot. In this guide, we’ll explore step by step how to grow broccoli in plastic bags, including soil preparation, watering, care tips, and harvest techniques.
🌱 Why Grow Broccoli in Plastic Bags?
Gardening in plastic bags is gaining popularity for several reasons:
1. Perfect for Limited Space
Whether you live in an apartment or have a tiny balcony, plastic bags allow you to grow vegetables in small spaces without a garden.
2. Portable and Flexible
Plastic bags are lightweight and easy to move, so you can place your broccoli in the sunniest spot or bring it indoors during harsh weather.
3. Cost-Effective
No need for expensive pots or raised beds. Simply use used or new plastic bags with drainage holes.
4. Easy Soil Management
You can control the soil type, nutrients, and drainage, giving your broccoli the perfect environment for growth.
5. Efficient Water Use
Plastic bags reduce water loss and maintain soil moisture, making watering more efficient.
🌿 Step 1: Choosing the Right Broccoli Variety

Not all broccoli varieties are suitable for container gardening. For plastic bag cultivation, choose compact and dwarf varieties:
- Calabrese Broccoli – Traditional and hardy.
- Sprouting Broccoli – Produces multiple small heads over time.
- Green Magic or Premium Crop – Ideal for containers and limited space.
Select seeds from a reputable source, preferably disease-resistant and fast-growing varieties.
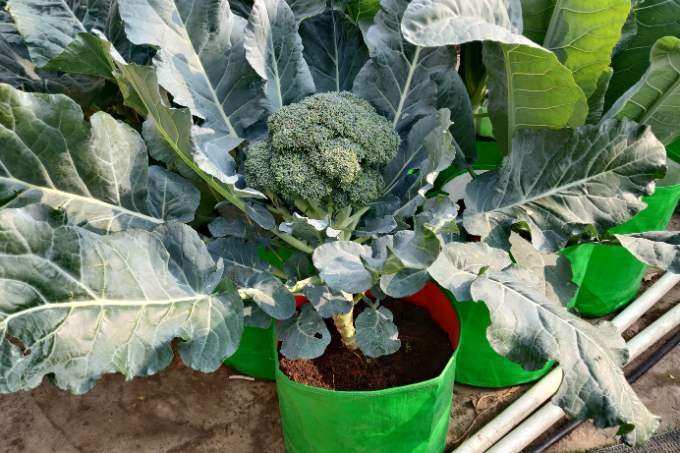
🌱 Step 2: Preparing the Plastic Bags
Plastic bags serve as your makeshift planters. Here’s how to get them ready:
Materials Needed:
- Thick, durable plastic bags (2–5 kg size works well)
- Garden soil or potting mix
- Compost or vermicompost
Preparation Steps:
- Punch Drainage Holes: Use scissors or a knife to make 4–6 holes at the bottom for proper drainage.
- Add a Soil Base: Fill the bag about one-third with small stones or coarse sand to improve drainage.
- Fill With Nutrient-Rich Soil: Add a mixture of garden soil, compost, and coco peat for light, fertile soil.
Plastic bags allow roots to grow freely while preventing waterlogging—a common problem in small-space gardening.
🌞 Step 3: Sowing Broccoli Seeds
Growing broccoli from seeds is simple and highly rewarding.
How to Sow:
- Fill a small seed tray or cup with moist seed-starting soil.
- Sow 2–3 seeds per cell, about 0.5–1 cm deep.
- Lightly cover with soil and water gently.
- Keep the tray in indirect sunlight and maintain a warm temperature (~18–24°C).
Germination Time:
Seeds typically sprout in 7–12 days. Once seedlings have 2–3 true leaves, they are ready for transplanting into the plastic bags.
🌱 Step 4: Transplanting Seedlings into Plastic Bags
Once seedlings are strong enough, transfer them carefully to plastic bags:
- Make a small hole in the soil, deep enough to cover the root ball.
- Gently place the seedling into the hole.
- Cover with soil and press lightly.
- Water thoroughly to help the plant settle.
Tip: Only plant 1 seedling per bag to avoid overcrowding and ensure optimal growth.
🌿 Step 5: Providing Sunlight and Environment
Broccoli thrives in cool temperatures (18–24°C) and requires adequate sunlight:
- Place bags where they get 4–6 hours of direct sunlight daily.
- In hot climates, provide partial shade during peak afternoon heat.
- Maintain good air circulation around the bags to prevent fungal diseases.
For indoor gardeners, fluorescent grow lights or LED plant lights can substitute natural sunlight.
💧 Step 6: Watering Your Broccoli Plants
Plastic bags help retain moisture, but consistent watering is essential:
- Water whenever the top 1–2 inches of soil feel dry.
- Avoid overwatering to prevent root rot.
- Use a watering can with a fine nozzle to avoid washing away soil.
- Mulch with straw or dry leaves to maintain soil moisture and regulate temperature.
Tip: Bottom watering by placing the bag in a shallow tray of water can also help maintain consistent moisture.
🌱 Step 7: Fertilizing for Maximum Growth
Broccoli is a nutrient-hungry vegetable, especially when grown in containers.
Fertilization Tips:
- Start Fertilizing 2 weeks after transplanting.
- Use organic fertilizers like compost tea, neem cake, or fish emulsion.
- Apply balanced NPK fertilizers every 2–3 weeks:
- Nitrogen for leafy growth
- Phosphorus for strong roots
- Potassium for overall plant health
Regular fertilization ensures large, healthy heads and multiple harvests for sprouting varieties.
✂ Step 8: Caring for Your Broccoli Plants
Proper care increases productivity and reduces problems:
Pruning and Maintenance:
- Remove yellow or damaged leaves promptly.
- Pinch off small side shoots to focus nutrients on main head growth.
- Watch for pests like aphids, cabbage worms, and snails; treat with organic insecticides if necessary.
Temperature Management:
- Broccoli prefers cooler weather; in hot climates, grow during early spring or fall.
- In warm seasons, shade the bags during peak heat to prevent bolting.
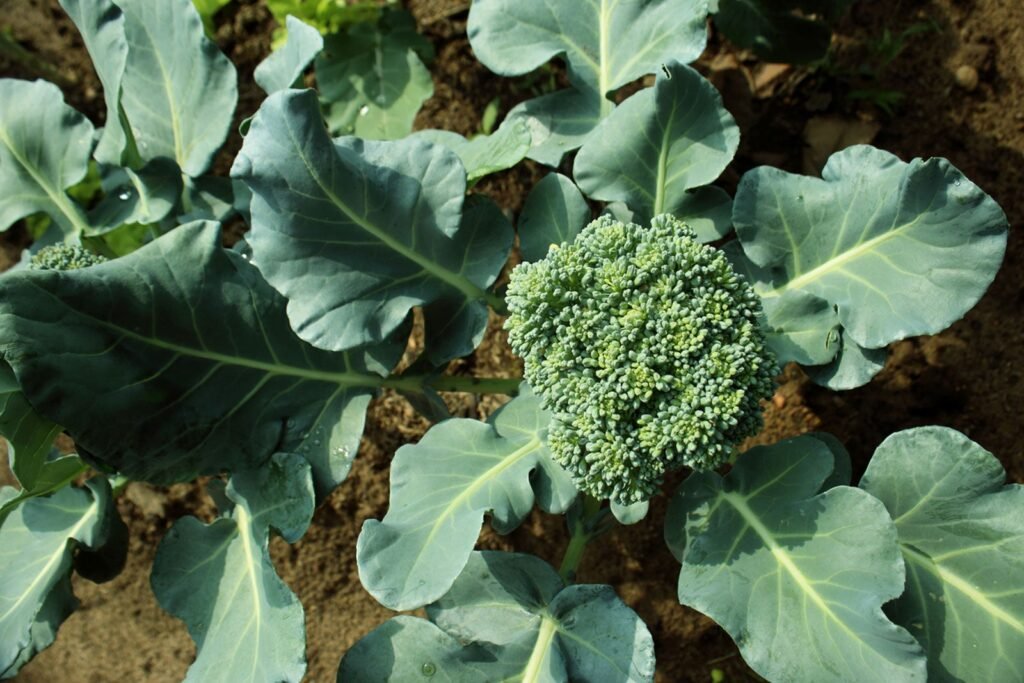
🌿 Step 9: Harvesting Broccoli
The best part of growing broccoli is harvesting your homegrown heads.
Harvest Signs:
- Flower heads are tight, firm, and dark green.
- Harvest before yellow flowers appear, which indicates over-maturity.
- For sprouting varieties, cut outer heads and allow secondary shoots to grow.
How to Harvest:
- Use a sharp knife or scissors.
- Cut the stem 5–8 cm below the head.
- Remove any damaged leaves and enjoy fresh broccoli immediately.
Freshly harvested broccoli can last up to 5 days in the refrigerator, or be blanched and frozen for later use.
🌱 Troubleshooting Common Problems
1. Yellowing Leaves
Cause: Nitrogen deficiency or overwatering.
Solution: Apply nitrogen-rich fertilizer and check watering schedule.
2. Bolting (Premature Flowering)
Cause: High temperatures or stress.
Solution: Provide shade and consistent moisture.
3. Pests and Disease
Solution: Introduce natural predators (ladybugs), apply neem oil, and keep the area clean.
4. Small Heads
Cause: Overcrowding or nutrient deficiency.
Solution: Ensure one plant per bag and maintain regular fertilization.
🌿 Tips for Maximum Yield in Small Spaces
- Use larger plastic bags (5–10 liters) for bigger root systems and healthier growth.
- Grow multiple bags to ensure a continuous harvest.
- Rotate crops to prevent soil depletion.
- Combine with companion plants like onions or herbs to deter pests naturally.
- Keep consistent care and monitor growth daily.
🌱 Final Thoughts
Growing broccoli in plastic bags is an innovative, practical, and highly productive small-space gardening technique. It allows urban gardeners, apartment dwellers, and balcony growers to enjoy fresh, nutrient-packed broccoli without needing a large garden plot.
From seed selection to soil preparation, watering, fertilization, and harvesting, each step is simple yet crucial for healthy growth. With a bit of patience and care, your plastic bag garden can produce fresh, delicious, and homegrown broccoli—proving that even in the smallest spaces, gardening success is possible.