Understanding the Sensitive Fern
The sensitive fern, or Onoclea sensibilis, is a unique and captivating plant native to North America. Known for its delicate, folding fronds that react to disturbances, this fern thrives in moist, shaded environments. Its sensitivity, however, also makes it more susceptible to shock during repotting. This article outlines how to repot a sensitive fern while minimizing stress on the plant.
When to Repot
Understanding the right time to repot is crucial. Sensitive ferns should generally be repotted during the spring, just before the growing season begins. This timing allows the plant to settle into its new environment effectively. Signs that your fern may need repotting include:
- Roots are visibly protruding from the drainage holes.
- The soil dries out too quickly.
- The fern appears stunted or unhealthy.
Materials Needed
Before beginning the repotting process, gather the following materials:
- New pot (2 inches larger in diameter than the current pot)
- High-quality potting mix, preferably formulated for ferns
- Small trowel or spade
- Watering can or spray bottle
- Scissors or pruning shears (for trimming roots)
- Plastic or paper sheet (to catch soil spills)
Steps for Repotting a Sensitive Fern
1. Prepare the New Pot
Begin by filling the new pot with fresh potting mix. Ensure that the mix is moist but not soggy. This helps create a welcoming environment for the fern’s roots.
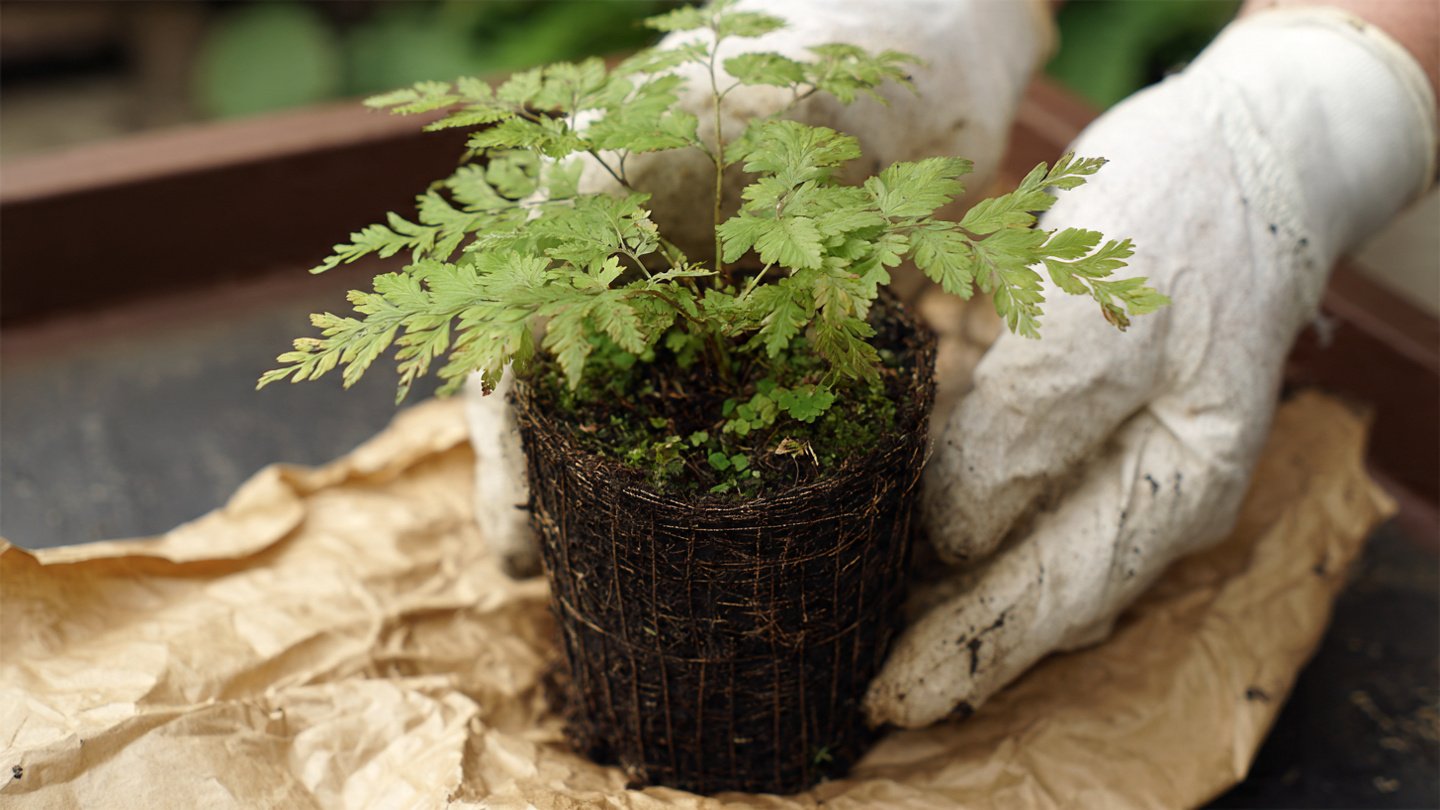
2. Remove the Fern from Its Current Pot
Carefully grasp the base of the fern and gently pull it out from its pot. If the plant is stuck, lightly squeeze the sides of the pot or use a trowel to gently pry it loose. Be cautious not to damage the fragile roots.
3. Inspect the Roots
Once the fern is out, inspect the root system. Healthy roots are typically white and firm, while brown or mushy roots indicate rot. Trim away any unhealthy roots with sterilized scissors to encourage healthy growth.
4. Place the Fern in the New Pot
Center the fern in the new pot and fill in around the roots with more potting mix, ensuring that the crown of the plant sits just above the soil level. Gently pat down the soil to eliminate air pockets while being careful not to compact the soil too much.
5. Water Thoroughly
Once potted, water the fern thoroughly to help it acclimate to its new home. Ensure that water runs out of the drainage holes at the bottom. This initial watering also helps settle the soil around the roots.
6. Create a Stable Environment
After repotting, place the fern in a location with indirect light and high humidity. Sensitive ferns thrive in humidity, so consider using a pebble tray or a humidifier to maintain moisture in the air.
Minimizing Shock: Extra Tips
To further minimize shock during the repotting process, consider the following tips:
- Avoid sudden changes: Keep the post-repotting environment as similar to the previous one as possible. This includes light levels and humidity.
- Use the same soil type: If possible, use a potting mix similar to the one used previously. This maintains the familiar environment for the roots.
- Monitor watering: Initially, check the moisture level of the soil daily. Ensure it remains moist but not waterlogged.
- Limit fertilization: Avoid adding fertilizers immediately after repotting. Wait a few weeks to allow the plant to recover.
- Be patient: Allow time for the fern to adjust. Some wilting may occur initially, but with care, it should bounce back.
Conclusion
Repotting a sensitive fern can be a delicate task, but with the right approach, you can significantly minimize the stress on the plant. By following these steps and tips, you can ensure a smoother transition for your fern into its new pot. Remember to monitor the plant closely post-repotting and provide it with the optimal conditions for recovery. Your efforts will be rewarded with a thriving and beautiful fern.
FAQs
1. How often should I repot my sensitive fern?
Generally, sensitive ferns should be repotted every 2-3 years or when they outgrow their current pot. Observational signs like root congestion or dried soil are good indicators.
2. What type of pot is best for a sensitive fern?
A pot with drainage holes is essential for sensitive ferns to prevent waterlogging. Materials like clay, ceramic, or plastic can be used, but ensure that it’s at least 2 inches wider than the previous pot.
3. Can I use regular potting soil for my sensitive fern?
While regular potting soil can work, it’s best to use a potting mix specifically formulated for ferns, as it typically offers better drainage and moisture retention.
4. What should I do if my sensitive fern starts to wilt after repotting?
If your fern wilts after repotting, ensure it has the right amount of moisture and check for any signs of root damage. Adjust the watering schedule as needed and provide adequate humidity.
5. How can I increase humidity for my sensitive fern?
To increase humidity, you can mist the fern regularly, use a pebble tray filled with water beneath the pot, or employ a humidifier in the room.