Gardening enthusiasts are constantly on the lookout for new and exciting plants to grow in their homes, especially those that can thrive year-round. One such plant is Malabar spinach (Basella alba), a tropical vine known for its thick, succulent leaves and the versatility it offers in the kitchen. This guide will walk you through the simple steps to successfully grow Malabar spinach indoors all year round, and we’ll also address some frequently asked questions to help you get the most out of your indoor gardening experience.
What is Malabar Spinach?
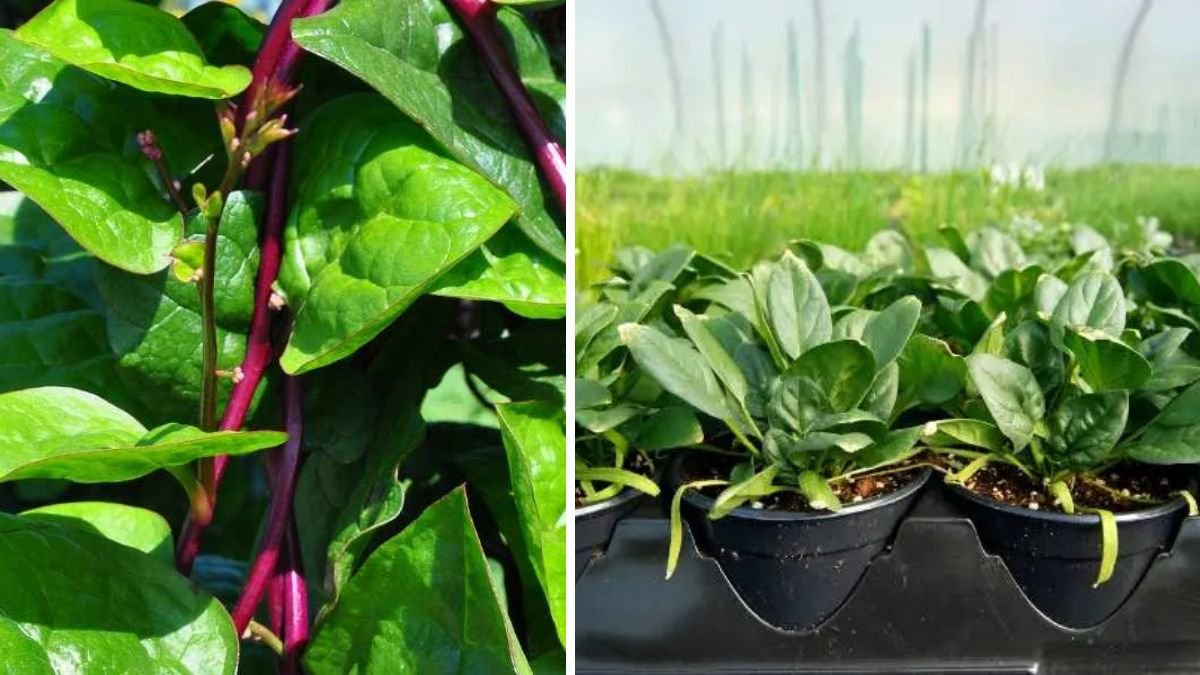
Malabar spinach, also known as Ceylon spinach or vine vegetable, is native to South Asia and is characterized by its heart-shaped leaves and climbing habit. Unlike traditional spinach, which is a cool-season crop, Malabar spinach thrives in warm temperatures, making it an excellent choice for indoor gardening. The leaves can be utilized in salads, stir-fries, soups, and even smoothies, offering a nutritious alternative to traditional leafy greens.
Why Grow Malabar Spinach Indoors?
-
Year-Round Availability: By growing Malabar spinach indoors, you can have fresh greens available even during harsh winter months.
-
Space Efficiency: Ideal for small living spaces, Malabar spinach can be grown in containers, making it suitable for apartments or homes with limited garden space.
-
Easy to Maintain: With minimal care, Malabar spinach is a low-maintenance plant that provides bountiful yields.
-
Nutritional Benefits: Rich in vitamins A and C, calcium, and iron, Malabar spinach is a healthy addition to any diet.
Step-by-Step Guide to Growing Malabar Spinach Indoors
Step 1: Choose the Right Container
The first step in growing Malabar spinach indoors is choosing the right container. A pot that is 6-12 inches deep and wide is ideal. Ensure that it has drainage holes at the bottom to prevent waterlogging, which can lead to root rot.
Step 2: Select Appropriate Soil
Malabar spinach thrives in nutrient-rich, well-draining soil. A potting mix with added compost or well-rotted manure will provide the necessary nutrients for healthy growth. Additionally, consider incorporating perlite or vermiculite to improve drainage.
Step 3: Planting the Seeds
Malabar spinach can be started from seeds or cuttings. If starting from seeds, soak them in water for 24 hours before planting to enhance germination. Plant the seeds about ¼ inch deep in the soil, spacing them 6-12 inches apart, and cover lightly with soil. If starting from cuttings, take 6-8 inch sections from healthy Malabar spinach plants, ensuring each cutting has at least one leaf node. Place the cuttings in water until roots develop, which usually takes 1-2 weeks.
Step 4: Provide Optimal Light Conditions
Malabar spinach requires a minimum of 6 hours of bright light daily. Place your container near a south-facing window to ensure it receives adequate sunlight. If natural light is insufficient, consider using grow lights with full-spectrum bulbs to supplement light conditions.
Step 5: Maintain Humidity and Temperature
Malabar spinach prefers warm, humid conditions. The ideal temperature for growth is between 70°F and 90°F (21°C – 32°C). If you live in a dry climate, regularly misting the plants or placing a humidifier nearby can help increase humidity levels.
Step 6: Watering Requirements
While Malabar spinach prefers moist soil, it is essential not to overwater. Water the plants when the top inch of soil feels dry, ensuring that excess water drains out of the container. Avoid waterlogging, as this can lead to root rot.
Step 7: Fertilizing Your Plant
Feed Malabar spinach with a balanced, water-soluble fertilizer every 4-6 weeks during the growing season. Look for a fertilizer with a balanced NPK ratio (e.g., 10-10-10). This will provide the essential nutrients your plants need to thrive.
Step 8: Support the Vines
As Malabar spinach is a climbing vine, providing support is essential for healthy growth. Install a trellis, stake, or even a string system for the plants to climb. This will not only save space but also promote air circulation around the leaves, reducing the risk of disease.
Step 9: Pruning and Harvesting
Regular pruning encourages bushier growth and increases yields. Pinch off the tips of the climbing vines to promote lateral branching. You can start harvesting leaves about 6-8 weeks after planting the seeds. Use scissors to cut leaves, allowing the plant to continue growing. Always harvest from the top down to encourage further growth.
Step 10: Pest Management
While Malabar spinach is relatively resistant to pests, keep an eye out for aphids, spider mites, and whiteflies. These can be managed using insecticidal soap or neem oil. Make sure to check the undersides of leaves where pests often hide.
FAQs
1. Can Malabar spinach be grown without seeds?
Yes! Malabar spinach can be propagated through cuttings. Just ensure the cuttings have a leaf node, and place them in water until they develop roots.
2. How long does it take for Malabar spinach to grow?
Generally, Malabar spinach takes about 6-8 weeks to start producing leaves after planting seeds.
3. What are the best varieties of Malabar spinach?
The two most common types are green Malabar spinach (Basella alba) and red Malabar spinach (Basella rubra). Both varieties are edible, but the red variety has a slightly spicier flavor and is known for its vibrant color.
4. How can I ensure better growth in winter?
To provide adequate warmth in winter, keep your Malabar spinach near a heat source or use a heating mat underneath the pot. Supplemental grow lights can also help maintain the required light levels.
5. Can I grow Malabar spinach in a hydroponic system?
Yes! Malabar spinach can thrive in a hydroponic system as long as you provide adequate nutrients, light, and support for the vines to climb.
6. Is Malabar spinach toxic to pets?
Malabar spinach is not considered toxic to cats or dogs; however, it is always best to monitor your pets and prevent them from eating any houseplants.
7. What should I do if my Malabar spinach leaves turn yellow?
Yellowing leaves may indicate overwatering, nutrient deficiency, or insufficient light. Check soil moisture, adjust fertilization, and ensure the plant receives adequate light.
Conclusion
Growing Malabar spinach indoors is achievable and rewarding, allowing you to enjoy fresh greens throughout the year. By following these simple steps, you can cultivate a thriving indoor garden that provides not only nutritional benefits but also a touch of greenery to your living space. Don’t hesitate to experiment and learn from your gardening experience, and soon you’ll be reaping the benefits of your own indoor Malabar spinach crop!