Growing watermelons at home may sound like a challenge—after all, these fruits are associated with large fields, long vines, and plenty of space. But what if I told you that you can grow delicious, sweet, and full-sized watermelons right in your own backyard with just a few practical steps and a little attention?
This is the story of how I turned a small patch behind my house into a mini watermelon paradise. Whether you’re a beginner gardener or someone trying fruit cultivation for the first time, this guide will show you exactly how to succeed.
🌱 Why I Decided to Grow Watermelons
Watermelons were always one of my favorite fruits—refreshing, hydrating, and perfect for summer. But store-bought melons often disappointed me. Sometimes they lacked sweetness, sometimes they were harvested too early, and sometimes they simply didn’t taste fresh.
So I decided: why not grow my own?
I didn’t have a massive garden, just an open sunny space of about 8 × 10 feet. But after researching different varieties and methods, I realized it was more than enough to produce great results.
☀️ Step 1: Choosing the Right Watermelon Variety
The first secret to success is variety selection. Not all watermelons are suitable for small spaces—some vines can run more than 15 feet!
I chose Sugar Baby, a compact bush-type variety known for:
- Small to medium-sized fruits (3–5 kg)
- Quick maturity (70–80 days)
- Super-sweet red flesh
- Shorter vines suitable for backyard cultivation
Other good options include:
- Crimson Sweet
- Black Tail Mountain
- Charleston Gray
- Mini Love (dwarf hybrid)
The key is to pick one that matches your climate and space.
🌿 Step 2: Preparing the Soil (The Most Important Part)
Watermelons LOVE rich, loose, and well-drained soil. Heavy or waterlogged soil is a disaster waiting to happen.
Here’s exactly how I prepared my soil:
🔸 1. Loosening the Ground
I dug the planting area about 12–14 inches deep to ensure the roots could spread easily.
🔸 2. Adding Nutrition
I mixed in:
- 2 kg of well-decomposed cow dung
- A handful of neem cake
- Compost enriched with kitchen waste
- A little sand for better drainage (optional)
🔸 3. Making Mounds
Instead of planting flat, I made raised mounds about 1 foot high.
This provides:
- Faster soil warming
- Protection from water stagnation
- Better root aeration
These simple steps significantly boosted my germination and growth.
🌱 Step 3: Planting the Seeds
I planted 3 seeds per mound, spacing mounds about 3–4 feet apart.
The seeds were pushed about 1 inch deep.
Watermelons germinate best when the temperature is warm—around 25–30°C—so I planted in early summer to take advantage of natural warmth.
Within 5–7 days, tiny seedlings started popping out. Since only one strong plant is needed per mound, I gently removed the weaker ones.
💧 Step 4: Watering the Right Way
Watermelon plants don’t like wet feet. Too much moisture can lead to fungal issues and slow growth.
Here’s the exact watering routine I followed:
🔸 Seedling Stage (0–20 days)
Water lightly every 2 days to keep the soil moist but not soggy.
🔸 Growth Stage (20–50 days)
Deep watering every 3–4 days.
This encourages deep root development.
🔸 Flowering & Fruit Setting Stage
Water only at the base and avoid wetting leaves.
🔸 Ripening Stage (Last 2–3 weeks)
Reduce watering drastically.
This concentrates sugars inside the fruit and makes your watermelons much sweeter.
🌼 Step 5: Pollination—The Turning Point
One morning I noticed something fascinating—large yellow male and female flowers opening.
The female flowers are easy to identify—they have a tiny baby watermelon (the ovary) just below the petals.
Bees normally take care of pollination, but to ensure a good fruit set, I hand-pollinated a few flowers using this method:
- Pick a newly opened male flower
- Remove its petals
- Rub the exposed pollen gently on the female flower’s central stigma
This almost guaranteed fruit development. Within days, I saw the tiny fruit swell and grow.
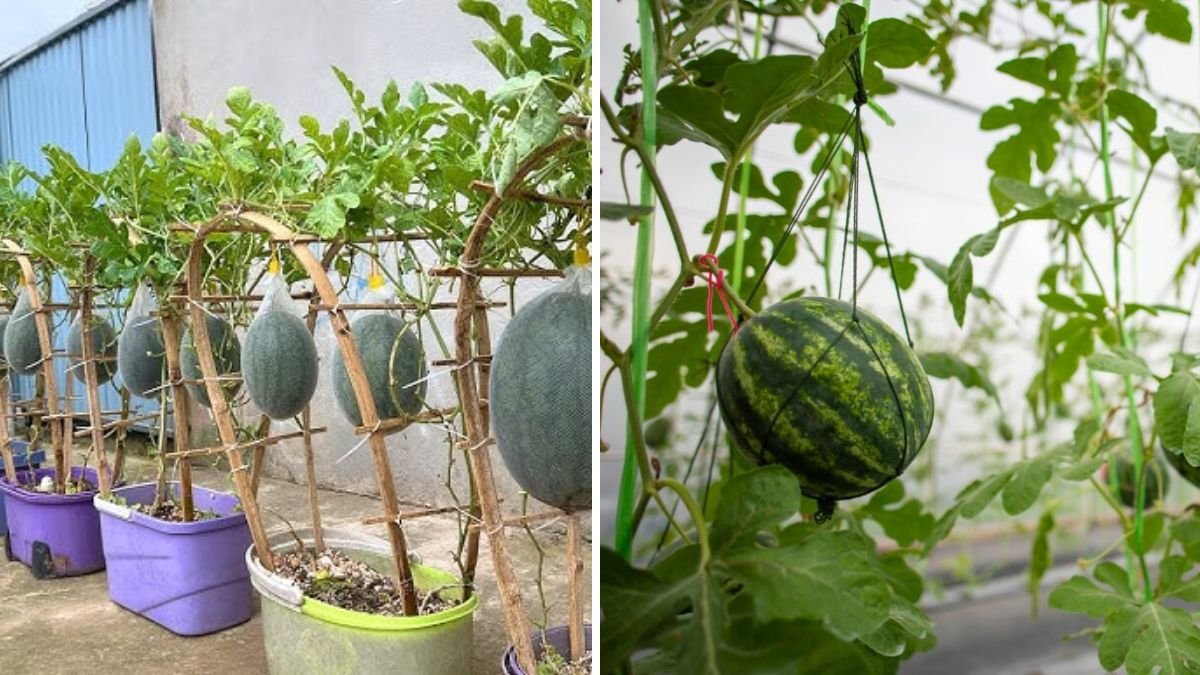
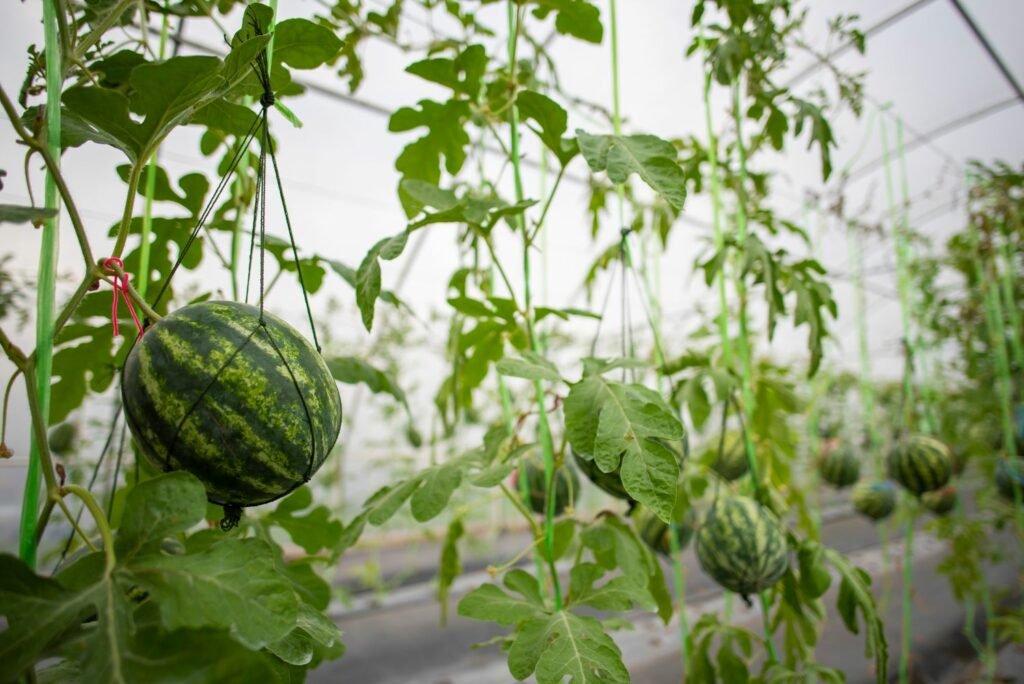
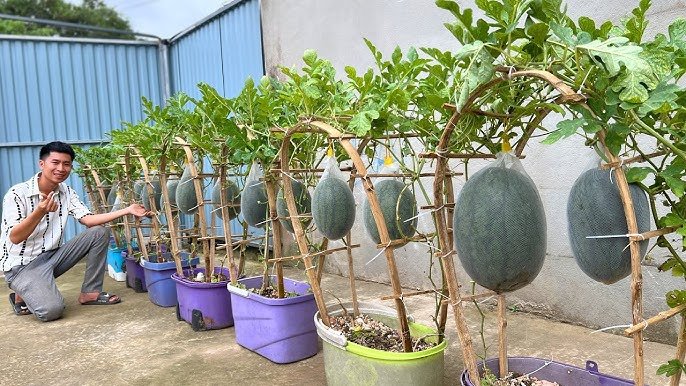
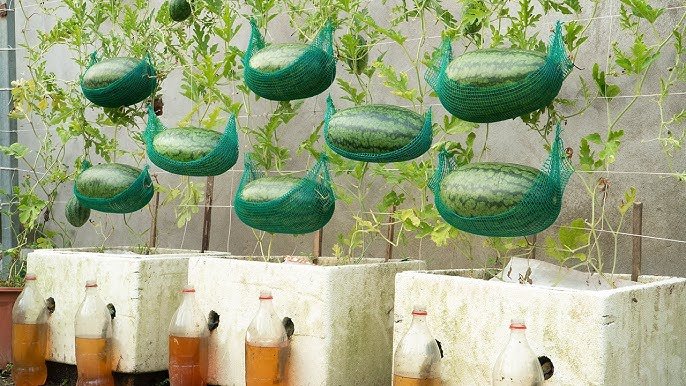
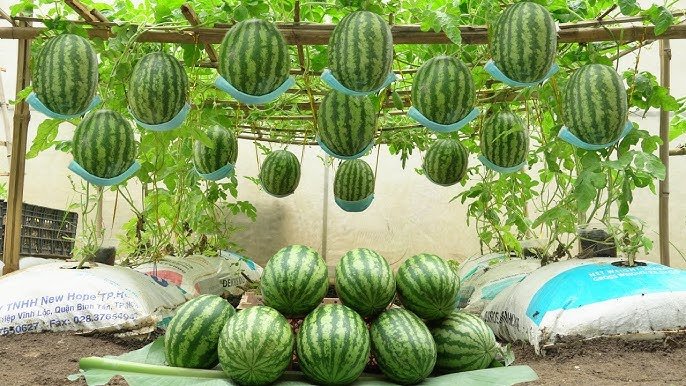
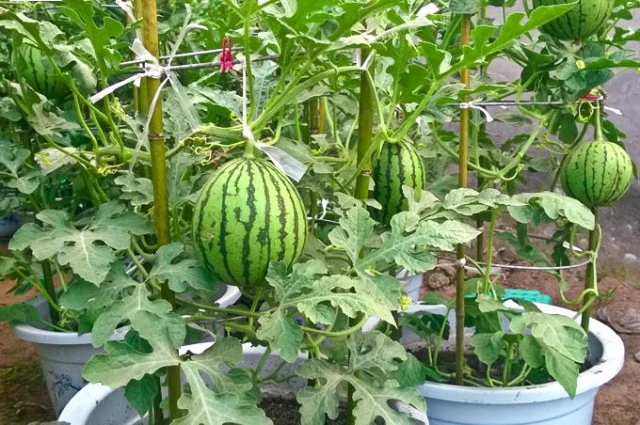
🍃 Step 6: Training the Vines
Watermelon vines can roam all over your backyard if not managed. I used these simple techniques:
- Directed the vines outward so they didn’t overlap
- Lifted the fruits onto cardboard or straw to protect them from moisture
- Pinched off excessive side shoots to focus energy on major fruits
These steps helped my plant produce 3 beautifully shaped melons.
🌿 Step 7: Fertilizing for Maximum Sweetness
I followed a simple, organic fertilization schedule:
At 20 Days:
- Cow dung compost
- A handful of bone meal
At 35 Days:
- Mustard cake solution (mild)
At Flowering:
- Wood ash for potassium
- Banana peel fertilizer (homemade)
During Fruit Development:
- Liquid compost (once every 10 days)
This kept the vines lush and the fruits growing fast.
🐛 Step 8: Pest & Disease Management
Watermelons can attract pests like:
- Aphids
- Beetles
- Fruit borers
Here’s how I controlled them without chemicals:
- Sprayed neem oil every 10 days
- Used sticky traps around vines
- Removed infected leaves immediately
- Ensured vines had good airflow
With this routine, I avoided major infestations.
🍉 Step 9: Knowing When to Harvest
This is the part many gardeners struggle with. But I used these proven methods to pick the perfect melon:
✔ The tendril nearest the fruit turned brown
✔ The underside turned from light green to creamy yellow
✔ The fruit made a deeper “hollow” sound when tapped
✔ The skin became dull instead of shiny
When I finally harvested my first watermelon, it felt like picking a jewel from the soil.
And the taste?
Absolutely heavenly—sweet, juicy, and far better than anything from the market.
🌟 Final Results: My Watermelon Harvest
From three vines, I harvested:
- 3 large, fully ripe watermelons
- Average weight: 3.2–4.5 kg each
- Deep red flesh
- Excellent sweetness
For a small backyard experiment, it was a huge success—and incredibly satisfying.
💡 Final Tips for Anyone Wanting to Grow Watermelons
- Choose compact or early varieties
- Plant when temperatures are warm
- Give at least 6 hours of full sunlight
- Use raised mounds for better drainage
- Do not overwater during ripening
- Encourage bees or hand-pollinate
- Feed potassium-rich fertilizers for sweetness
Follow these steps and you, too, can enjoy fresh, home-grown watermelons straight from your backyard.